The Not-Yet-Adapted-to-N3 Edition

Format of this Thread
Welcome to the Tohaa guide, which covers all the basic ins and outs of the EI's most determined opponent. This thread is dedicated to Tohaa strategy, tactics, commonly used combo's, model breakdowns, notable opponents and whatever else we'd like to include. The setup for this thread is that new additions are added procedurally, either by linking to specific comments or topics, or by editing the existing texts. I implore you all to add your thoughts, provide alternative observations and whatever else, so that we might build an up-to-date guide to the Tohaa arsenal. I'd be remiss here not to mention and link to Tam's Tohaa Tactica Thread, which is excellent (be sure to read Tamrielo's thoughts on Triad composition), but deals with a more specific range of topics.
TO BE CLEAR: this thread is completely open to disagreement, additions and corrections as far as I'm concerned. I'll add, change and link as needed over the course of time, including in response to model releases.
Index
1. Specific to the Tohaa
2. Strategies of the Tohaa
3. Tactics of the Tohaa
4. Tohaa Arsenal
5. Getting Started
6. Useful Links
7. Tohaa Battle Reports
1. Specific to the Tohaa
The Tohaa are notable in that they're a new faction introduced into the existing Infinity universe, and they come with their own set of special rules which put their definitive marks on the Tohaa play styles. We'll be covering these first.
Fireteam: Tohaa
Many Tohaa models have the Fireteam: Tohaa special rule. Models with this rule can form a Link Team of exactly 2 other models with this same rule, and you can have as many of these so-called Triads or Tridents as you want in your army. There are no restrictions to which models can be in which Link Team, the models only need to have the Fireteam: Tohaa rule to qualify.
This is an amazing capability at the Tohaa's disposal. The three main benefits are:
1. On the actve turn the Link Leader gets +1B to his/her bursts.
2. In the reactive turn every Team member gets +1B on ARO shots.
3. Each model in the Team gets to move per short skill spent.
The first benefit means all sorts of shenanigans become possible: B5 HMG rounds, B2 Smoke or Swarm Grenades, an extra Sniper shot etc. The extra B really boosts your odds in a firefight, and getting B2 on a Makaul's Zero-V Smoke Grenades helps immensely with getting upfield. The second benefit makes most of the Tohaa army extremely dangerous to approach. A B2 ARO on most models in an army is very threatening, and will force opponents into unfavorable trades against your Link Teams. The third benefit is the most massive, as it allows Tohaa armies to be extremely fast. With only a few orders spent, Tohaa players can get their entire force into position, and still have 4-6 Orders left for an alpha-strike or sneak attack.
That said, the Triad rule is not the be-all end-all of the Tohaa, the game is not over if all Triads are broken, but making the benefit count—especially for getting into position—will often mean the difference between a good start and an early handicap. Be extremely judicious with your placement; if you're not careful against template weapons, losing 2 models from a single shot is not going to be a rarity for you. Learning good placement is one of the key skills players will have to develop to be successful with the Tohaa.
Symbiont Armor
Wearing Symbiont Armor is a special thing; some Tohaa fighters effectively wear a living creature that bolsters their abilities and—crucially—allows them to survive a single Wound. The Tohaa have access to models that get an effective 2W for very low costs, and this allows them to trade pieces very effectively; at the same price range enemy combatants will usually only have a single Wound to spare, making the odds of a Tohaa victory in a one-on-one firefight very good against a similarly skilled opponent (especially when benefiting from the Triad rule's +1B). In addition, if a model with Symbiont Armor becomes immobilized, or is hacked stationary, the combatant may immediately shed its Symbiont and be immediately free of the impairment. This can save your fighter's lives on many occasions. Speaking of saving lives; MediKits are more reliable when used on models wearing Symbiont armor; they don't suffer the -3PH penalty, making the MediKit less of a gamble.
Having Symbiont Armor is mostly a benefit, but there are limits to this asset. Symbionts are weak to Fire weapons; failing an Armor save against a Fire weapons means the model wearing it immediately dies. In most cases this means that Tohaa players will have to keep a careful eye out for Fire weapons, especially when fielding more expensive warriors. An additional quirk pertains to healing: only Doctors that are also Engineers are able to restore an Unconscious Tohaa model wearing (inactive) Symbiont Armor to 1W, and Symbiont Armor itself cannot be restored at all. Finally, warriors losing their Symbiont armor automatically fail their Guts check. While not a gamebreaker, it's something to consider when placing a model in a crucial ARO overwatch position.
Nanotech, Swarm & Viral
The third aspect of the Tohaa's main flavors is the presence of Nanotech, Swarm and Viral weapons. While not at all omnipresent, the Tohaa can easily bring a number of these weapons to bear in almost any list. All three ammunition types are special in that they do not target enemy ARM, but instead their BTS. The great thing about this is that these ammunitions can circumvent the armor of tougher combatants, making them powerful against enemies that would otherwise be difficult to dislodge. Viral ammunition is especially lethal, seeing as it forces the enemy to make 2 BTS rolls per shot that hits them, and both Viral and Swarm ammunitions bypass the Unconscious state: any model brought to 0W by these ammunitions is immediately Dead. Nanotech ammunition is not as famous, but lethal in its own right; the Tohaa Nanopulsers are template weapons that target enemy BTS rather than Arm, and can be a nasty surprise to opponents who only took note of whether you are packing Swarm or Viral weaponry.
The trouble however with all three ammunitions, is that against models with as little as -3BTS, they start losing effectiveness fast, especially considering the average power on the weapons that use them. This means that Tohaa players will have to bring a good mix of Viral and non-Viral, Swarm and non-Swarm weaponry, and no more than one or two Nanotech weapons, to be ready for any opponent.
2. Strategies of the Tohaa
This second heading will outline a number of common strategic questions specific to the Tohaa, and provides suggestions on approaches, as well as solutions to some problems that commonly crop up. Strategies are overarching approaches to combat, as distinct from tactics, which are responses to very specific problems.
ARO
One of the main ongoing discussions among Tohaa players is about how best to approach model placement for the reactive turn. There are two general approaches that I will outline, the first I will refer to as Action Style (AS), to the second as the Reaction Style (RS). Most players agree that elements of both approaches will be necessary under different circumstances, but getting a handle on what these approaches mean will allow you to engage in firefights on your terms far more effectively.
Action Style (AS) takes advantage of the active turn, preferring as much of the Tohaa action as possible take place on the active turn. Usually the rationale behind this is that in Infinity the active turn is more powerful; it's always your turn, but you want it to be your turn as much as possible. Players using Action Style will end their active turns pulling their soldiers into safety; behind corners, into cover etc. As a Tohaa player, exposing models during your reactive turn often means risking a Link Team, the Tohaa's source of its intense Order efficiency; losing Link Teams effectively means losing punching power for the next active turn. Therefore it becomes preferable to avoid losing models during the reactive turn, which promotes placing your models to actively avoid AROs. This means that Tohaa forces using AS behave very much like a hit and run army; popping out for a swift offensive, only to retreat into hiding when the enemy counteroffensive starts up. The cornerstones of AS are the emphasis on the importance of preserving Link Teams, as well as fast active turn offensives.
Reaction Style (RS) on the other hand is geared towards taking advantage of the Tohaa's Link Team bonuses on the reactive turn. During the active turn, only a Link Team's Leader may perform actions; on the reactive turn however, all models in the Link Team get +1B to ARO shots. Attacking a Tohaa Triad—especially when 2 models get AROs—is a risky proposition, and RS players have good odds of taking out enemy models on their reactive turn, and at the same time controlling a large swathe of the battle field. RS players will take their active turn as normal, but attempt to place their fighters in effective overwatch positions, catching enemies in their line of fire whenever the opponent tries to do anything. RS players will often make more heavy use of Supression Fire. The cornerstones of RS are the focus on setting up powerful ARO crossfires and board control.
Zero-V Smoke
The Tohaa are lucky enough to have access to Zero-V Smoke grenades, a powerful tool for their purposes. Zero-Visibility smoke is exactly that: smoke that nobody will be able to see through. The Tohaa are highly maneuverable, which is great, but they need to get relatively close to be effective, and a lot of movement also means a lot of exposure. Many players field Makaul to include in their Triads; Makaul carry the grenades, and have good throwing arms. In addition, the grenades benefit from the +1B Link Team bonus, so you usually get 2 attempts at tossing the grenade where you want it. Usually smoke is used to cover the advance of a Triad, even by simple throwing the grenades at their feet, and so creating smokey paths to traverse ARO-free. A point of note however: our very own models wearing Multi-Spectral Visors are also incapable of seeing through Zero-V smoke. But, while we can't see through our smoke, it ís possible to shoot through it, using Suppression Fire; sure the accuracy drops down a fair bit, but because the smoke only lasts for one turn, it'll be gone during your opponents active turn, allowing us to setup controlling the field without risking too many AROs. It is worth noting here that Swarm Grenades also create low visibility areas, these last for a round, so you might occasionally benefit from those.
Special Deployment
The Tohaa have access to two models with a special deployment; the Clipsos Infiltrator and the Gao-Tarsos. The Clipsos is an affordable TO Camouflage Infiltrator, while the Gao-Tarsos is a drop trooper sporting heavy weapons and an extra Wound. We'll go over their capabilities later, here I'll simply put a note regarding the general use of Special Deployment for Tohaa players. The Tohaa can have problems with certain models due to their small model selection, and Symbiont weakness to fire. Tohaa weapons do not have exquisite range bands, and Tohaa have no ways to effectively scale buildings; taking out key opponents will often be a huge boon. Both the Clipsos and the Gao-Tarsos can be used as assassins; you choose which models you really need to take out early in the game, and you send in one of these two to do the job. Getting rid of a FIRE template weapon, or a Sniper in cover, or a capable Hacker is even more useful for the Tohaa than it is for other armies.
Impetuous
Two of the most popular Tohaa combatants--Sakiel and Makaul--are Impetuous troops. Impetuous troops rush towards the enemy at the start of your active turn, and keeping Impetuous troops alive and well can be tricky. The Tohaa have a special relationship to the Impetuous rule, as models in Link Teams do not take their Impetuous Order. This means you can easily keep them safe and tethered to your group. Forming a bunch of Triads filled with Impetuous models is a great way of keeping them under control, and things become even more interesting once they are released from a Link (either on purpose or by losing a team member), because of the way Tohaa play. The Impetuous Order keeps the mobility of your troops high, even outside of Triads, and the extra movement saves you Regular Orders to spend on moving up your fighters. The key element here—again—is placement, if you can make sure you have 4” space to move your Sakiel or Makaul, you'll probably be benefiting more from Impetuous than controlling it. A neat trick can be bringing a Triad with 3 Impetuous troops, moving them up (efficiently) on active turn 1, then breaking the Link manually at the end of the turn, and you'll have 3 close-quarters fighters in the fray on turn 2 for a rock-bottom cost in Orders.
Range Bands
The Tohaa are not known for the impressive range on their weapons; most warriors carry Combi Rifles, which are decent weapons, but cap their range at 16”, which isn't very far. Even the Viral weapons cap their optimal range at 16”, and grenades get even less. This means that the bulk of your forces will have to get reasonably close to the enemy to reliably take them out. There áre options for longer ranges, but probably only 2 models will bring a HMG or Sniper rifle, while the rest are working with Combi Rifles and Flamers. Luckily, the Tohaa are very good at closing the distance, so getting there shouldn't be the issue. There are two problems however; one is being shot on the way over, the second is getting so close that you get into the range of the enemy's short ranged weapons, most notably Chain Rifles and especially Flamethrowers, which are not only a threat due to the Symbiont Armor weakness, but especially because they're often carried by relatively cheap models that can take out an entire Triad with a shot if you're not very conscious about your placement. The Tohaa are that rare army that might actually consider backing up, away from the enemy forces.
Indirect Fire
A consideration to make with the Tohaa is whether or not to make use of indirect fire weapons; the current options are Swarm Grenades on the Clipsos, Sakiel and Makaul, the LGL on the Kamael, the Mines on the Clipsos and the GHRL on the Chaksa Auxiliar. The advantage to indirect fire weapons from a Tohaa perspective is that using them doesn't risk your Triad members. Because of the Tohaa's relatively low ranges, getting close enough to throw grenades at the enemy happens relatively often.
List Building
Tohaa don't generally have cheerleaders; most lists are completely filled with models that have an intended purpose, and will take part in some form of combat; even if it's only filling out a Triad. Tohaa lists have a lot of moving parts, and even lists with obvious center pieces--such as the Gorgos--will contain very few--if any--models that simply stand around providing Orders. Do not go looking for a Rambo model, there's not really one around (currently). This also means that the Tohaa don't make use of a lot of expendable models. Expendable models in this context are models that you can afford to lose at any part of a game; they are usually very cheap, often carry direct template weapons and are often fielded in multiples. Tohaa fighters usually do best in Triads, this means an implicit effort to keep them alive at least long enough to have achieved their goal(s).
One of the first considerations any Tohaa player will make is how many Triads to include in their fighting force, and there doesn't seem to be an obvious answer. Most players seem to field 2 Triads, some field 1 or 3, and you get the occasional 4-6 with spam lists of Kamael and Makaul. Tohaa players have to make a special consideration however: most lists are limited to a single Combat Group, which means a maximum of 10 models. If a player fields 3 Triads, there's only 1 slot for non-Linkable troops, putting a limit on the effective model selection (which is already pretty small). The great thing about fielding 3 Triads is the supreme Order efficiency while still leaving just enough space for the single Gao-Tarsos or Clipsos as a wild card. Nót fielding any Triads is possible, but currently there don't seem to be any common lists around that don't have at least 3 models with the Fireteam: Tohaa special rule in them, so nót making use of it seems like you'd be intentionally handicapping yourself.
Once you've decided what the amount of Triads in your list will be (if you have a preference of course), you have to start covering your bases, figure out what you need. Obviously every list needs some suitable firepower, and many players will include at least 1 or 2 Viral weapons, and a Spitfire or HMG if they can. Beyond the very basic questions of list building that are common to all factions come a few more specific questions. The first of these will be: 'do I need a MSV2 in my army?' The answer is no, but you might want to include one anyway. Tohaa don't have any smoke tricks, but seeing through enemy smoke and ignoring enemy camouflage are great advantages to have. The second question will be: 'do I need some kind of special deployment?' And here the same answer applies. We discussed the benefits of special deployment for Tohaa earlier, and bringing at least 1 model that can take out key enemies is very common practice at medium-to-high point levels.
Triad Composition
You are not forced to keep the same Triad composition. You are not forced to keep the same Triad composition. From game to game, and even during games, you can freely mix and match which models to include in which Triads. The Tohaa don't have a very wide model selection yet, but simply switching up the Triads can keep opponents guessing, and allows you to tailor your Triads for the specific needs of the battle. Do not pigeonhole yourself into thinking you need to find the optimal setup, from which you should not deviate; battles change, and being predictable is a good way to get yourself shot. Switch it up, mix and match, rotate your Lt's etc. Sometimes you'll need your ADHL grouped with your Viral, other times you'll need a full Impetuous Triad, base your compositions on the actual circumstances of the upcoming battle.
That said, what is the outline of the average Triad? Well, we should probably start with a Makaul. I'm not trying to be facetious here, one of the first considerations many players have is whether or not they want to include a Makaul in the Triad. The reason is usually that the Makaul offers Zero-V Smoke (and a Direct Template weapon); if you want to be able to protect your Triad, you're probably going to take a Makaul. Then comes the matter of function; what do you want the Triad to accomplish (remember you can do this at the start of a battle so you know the opponent, terrain and objectives)? This will dictate whether or not you inlude a Gao-Rael or a Kumotail, both, or whatever else. Long range fighting will probably dictate an Ectros or Gao-Rael Sniper (this kind of triad needs few Orders, and can do well in a sparse second Command Group), medium-to-close range will tend towards Sakiel and Neema.
Deployment
Which is more beneficial to the Tohaa; Initiative or Deployment? This is difficult to say, as every battle is different, but overall Tohaa seem to benefit a lot from Initiative. Getting first turn usually means the Tohaa forces can move into good positions, most tables do not have tons of cover in the deployment zone, and Tohaa's high movement allows them to control the field very well if they can close the distance on that first turn. In addition getting first turn allows Tohaa players to use the Impetuous trick more reliably; starting three Triad models with Impetuous out of their Link so you get an Impetuous move on your first turn, thén Link up and move as normal. This is less reliable if the opponent is able to move around messing up where your Impetuous models have to go. The advantage to taking Deployment is that letting the opponent go first lessens the distance your troops have to travel to get into optimal range. Make sure you choose a table side with oodles of cover though; you'll enjoy having all your links intact on your fist active turn.
3. Tactics of the Tohaa
This heading goes over a host of tactics the Tohaa can employ to bolster their advantage or deal with enemy tricks and maneuvers. The implementation of tactics will vary greatly from instance to instance, but it helps to know what options are out there to cope with potent threats.
Dealing with Smoke
It's difficult to fight what you can't see, and going up against opponents that are engulfed in smoke can be difficult. The Tohaa do not have an especially large disadvantage against smoke armies; in fact we are usually the ones dishing it out. The obvious responses are to bring a Gao-Rael and/or direct template weapons to counter smoke, and this is fine. But, more Tohaa-specifically, there are a few other things you can do. The first option is to turn smoke against the enemy by using it to screen your guys using their smoke, or laying down your own smoke to build a bridge towards the enemy. In general though, the Tohaa are better than most at simply avoiding smoke by taking different routes where no templates are blocking the view.
Dealing with Fire
Coming to grips with fire weapons is less of a big deal than it might seem at first. Yes, your Symbiont wearers can die instantly to them, but so can most other models in the same price class. The thing to remember is to properly angle your models so they don't easily get caught under a template and you'll do fine. Aside from that there's the more general advice of bringing assassins (Tarsos & Clipsos) to take out key threats and Chaksa to guard the field; no rocket science involved.
Dealing with Template Weapons
When up against any enemy, it's worthwhile to take note of any and all template weapons the opponent has access to, this includes not only direct template weapons, but also grenades and rocket launchers. Tohaa players tend to have a powerful impulse to bunch up their triads, making them prime template targets; this is an instinct we have to suppress wherever possible. It's exceedingly easy to lose a large chunk of your army to a well-placed template, so practice gauging your maximum control zone distances. Try leapfrogging your triads instead of moving them up in a bundle, even a lucky ARO can leave you without a triad to advance.
Dealing with Guided Weaponry
It is worth noting the famous Hacking Device Plus + Marker + Guided weapon combo here, not only because it's so dangerous, but also because it involves powerful enemy hacking and a template FIRE weapon. It's basically an anti-Tohaa triple whammy. Here, as is common in this game, the best defense is a good offense, because defensive hacking is not the Tohaa's strong suit. Instead be proactive in bringing the fight to the enemy; take out the Guided weapon or the Markers, and don't be bullied. Countering this tactic is one of the main reasons to bring a Nullifier in your force; it is a true hard counter. This is a decision that will be based on meta; if Guided weapons are common, consider kitting your Sakiel or Clipsos out with a Nullifier or two.
Dealing with Camouflage & Airborne Deployment
You can't hit what you can't see, and Tohaa are vulnerable to losing models from their triads, so getting hit by a Camouflaged model or suffering a violent airdrop can really harm our momentum. Many lists benefit from insuring themselves against these kinds of attack, and both options involve Chaksa. Triads don't get access to Sixth Sense, so getting a Chaksa Baggage with Sensor can be a life-saver against Combat Camo, while the Chaksa HMG with Neurocinetics can unload on aggressive airdrops or infiltrators. Other than that, remember to spread triads out and keep fighters facing in different directions to minimize the amount of unopposed shots the enemy is able to bring to bear.
Dealing with Hacking
Currently there are only three Tohaa models vulnerable to Hacking (the Gorgos, Neema and Ectros), and these are all pretty resistant to it. In fact, the ability to eject from their heavy Symbionts makes them less vulnerable to hacking than other armies. The Tohaa defensive hacking device will mostly be used against Guided weaponry, and the Nullifier can be a key tool to deny a lot of enemy tactics. Many Tohaa lists can afford to forego any hacking elements, just as long as they're prepared for Guided weaponry.
Reforming Triads
You're going to be breaking your Links often, either through losing models, wonky placement or out of choice, you're going to be faced with the consideration as to whether or not you want to reform a Triad. You can use your Lieutenant Special Order to reform one eligible trio of models, and only that Order can be used to do it. Reforming Triads doesn't happen every game, and especially during shorter games the loss of mobility does not always weigh up against the cost of planning and executing a reform, but there seems to be a number of players who keep a single eligible model close to key triads so they can step in when thing get hairy; it's even possible to bring a cheap link of 3 Makaul that are solely there to escort a Triad of heavy hitters and complete them when their link breaks.
Securing the Field
Tohaa benefit from a steady momentum, keeping the opponent on their toes and pressing the attack. It's a big liability when the enemy is able to catch you in the side or back with a sneak attack. Securing the field against such intrusions can save you a lot of grief, and there are a few ways to go about this. The first and foremost is good placement of Triads; make sure you have a Triad member looking into the backfield whenever possible, so you can catch enemy drops immediately and greatly reduce your odds of getting clusterscrapped. The second route is to bring Chaksa Auxiliars; the HMG version is great for guard duty, and the Sensor version is a very useful scout. Finally you can consider the Clipsos; there's no reason you wouldn't be allowed to have your Clipsos keep watch over your own side of the field, especially if it's already on Nullifier duty for example; it's an option to keep in mind, as it's something only the rare opponent will see coming.
Using the Nullifier
The Nullifier is a curious piece of kit, shutting down hacking, sepsitor, FO and Flash Pulses within its area of effect. There are basically two ways to use it; offensively and defensively. The offensive method is to place a Nullifier close to an enemy model, usually with a Clipsos, denying them options. The defensive method usually consists of placing the Nullifier in a firebase; making any HI or TAGs near it immune to hacking and avoiding any Forward Observers looking to mark them with the big guns. A note here is that the Nullifier does not shut down the functions of terrain elements unless you specifically rule that way.
Using Flash Pulses
As the Delegate has made clear, flash pulses can be very useful, don't forget that every Forward Observer brings this tool to bear. Flash Special Ammunition can essentially shut an enemy model down for the turn, and it's an exceptionally useful tool that is strangely unapparent at first when Guided weapons seem more attractive. It's the high-tech equivalent of shining a laser pointer in someone's eye, use it to disable dangerous ARO threats and for waylaying heavy hitters with a surprise Combat Camo Flash attack.
4. Tohaa Arsenal
The Tohaa have access to a fairly limited model selection, so currently many lists will feature the same base models. This is unfortunate in that it means that cunning opponents can start anticipating your maneuvers as they get more knowledgeable about our army. Luckily, there is a lot these models can do.
Gorgos Squad [TAG]

Players are not having a lot of (reported) luck with the Gorgos, even with the Perifericial. Its especially large weakness to fire, but especially its--for a pricey TAG--unimpressive weaponry make it a selection that seems hard to justify when there is such amazing LI and HI among the Tohaa. The Gorgos is strong and tough as any TAG, and it has a Symbiont armor 'pilot' with all the benefits that brings, although it is the only TAG currently known to be affected by i-Kohl. If it becomes possessed, the Periferical is turned as well.
Clipsos Infiltrator [SK]

The Clipsos is amazing, at this time it is hampered by the lack of other TO options (to disguise the identity of mines), but nonetheless the Clipsos brings an amazing set of tools for a very, very low cost. The Clipsos has reasonable stats and abilities, each of its loadout options is useful and well-costed; any force that brings one or more along for the ride will most likely be happy they did. In objective-based games the Clipsos shines even brighter, bringing a very reliable way to fulfill objectives to the table for a low cost.
Makaul [WB]

Every other faction is jealous of the Makaul. The description '10100 : A special number whose symbolism refers to titanic strength and courage as well as the concept of salvation from a physical danger.' is right. With great stats and abilities, a low cost and great loadouts, the Makaul is as close as you get to an auto-include in this game. Only the Combi loadout might see limited use with most players. It is very possible to play without Makaul, and certainly players do play without Makaul, but the Zero-V smoke, Heavy Flamethrower, Viral CCW and Swarm Grenades on a Regular Linkable model is just very hard to pass up.
Neema Satar [HI]

There doesn't seem to be a clear place where Neema fits in the current Tohaa metagame; she's an Ectros with a bunch of extra tricks and a very high WIP. She's an excellent Lieutenant, but usually a very obvious one, and lacking a (non Spec-Op) Chain of Command model makes her a risky Lt, because her weaponry forces her to get relatively close to the action. Luckily, you don't have to reveal your Lt's WIP anymore, slightly mitigating this issue. Her Martial Arts Lv2 makes her more deadly up close, and grants the excellent V: Courage, but her LRL doesn't command the power most players expect from a model in her price bracket.
Ectros Regiment [HI]

The Ectros is a very powerful piece, bringing very high stats for his points, coupled with the Fireteam: Tohaa rule to boot. It is one of those rare HI that has 4-4 Mov and an effective 3 W. But, this is because it wears Symbiont Armor, meaning there is a slight catch. Current wisdom on the Ectros emphasizes its relatively large weakness to fire, which means there's a generally perceived benefit to keep the Ectros fighting at range, rather than getting close. In general, this means that the Ectros is fielded with the HMG loadout, and the other 3 options are mostly left unused. The HMG is a powerful weapon, well used on a resilient model, keeping it out of range of most fire weapons if and when they show up. A note on the Ectros is that it surprisingly does not have V: Courage, meaning it might not keep its vantage point when under attack.
Gao-Tarsos [MI]

The Gao-Tarsos does not feel like MI, it feels as though you're dropping HI into enemy lines. Using Combat Jump it can be deployed right in the middle of the enemy, where it's Symbiont Armor will usually allow it to survive at least long enough to rain hot lead down on the defender's heads. The Tarsos is also usually sent down with an HMG due to its cost and function, but can be used in multiple roles; although the Paramedic option will most likely be skipped over. Luckily for the enemy, the Tarsos cannot be part of Triads. While the Tarsos cán be used for grabbing objectives, it is a relatively unreliable piece, prone to scattering away from where you need to be; those are jobs the Clipsos is generally more suited for.
Gao-Rael [MI]

If you're looking for a specialist, odds are good you're going to look at taking a Gao-Rael. As the slowest of the Linkable Tohaa troops, with a 4-2 Mov, it will usually take the role of hunter; taking a good position, and harassing choice prey that dares show itself. The most obvious selling point of the Gao-Rael is its MSV2, which is an excellent tool to have in your arsenal, as it allows you to ignore Camouflage and most smoke types in the game, allowing the Rael to do its job--taking out enemies that are normally hard to hit--very well. Because the Rael is in Symbiont Armor to boot, it has an extra wound, which, coupled with +B1, makes it very likely to win its first engagement. The Gao-Rael is usually a Sniper, but all of its loadouts are viable, including the once-in-a-while Lt. version when there are no choice targets to glue. Even the Boarding Shotgun loadout is interesting, because it lets the Gao-Rael bring along Swarm Grenades. Swarm Grenades create low-visibility zones, through which the Rael can promptly peek.
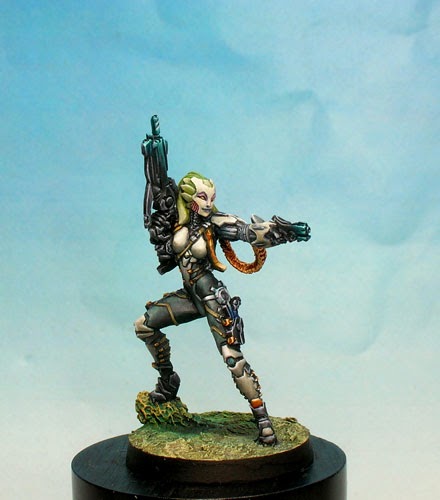
Sakiel Regiment [LI]

The Tohaa have access to some amazing LI, and the Sakiel is arguably the greatest of them all. For a very low cost you get access to a model with great stats and abilities, Symbiont Armor, and a powerful--versatile--loadout selection. Almost any list can benefit from the Sakiel. Sakiel are the most common vehicle for Viral Combi Rifles, and their high speed, Symbiont Armor and V: Courage allow them to deliver their payload effectively. Aside from the Viral Combi loadout, the Spitfire option probably sees the most play. Tohaa players the world over are waiting for a Sakiel Viral blister or box.[/font]
Nikoul Ambush Unit [LI]


The Tohaa are getting a new release in the form of the Nikoul Ambush Unit. Their profile has been released, but it's unclear if they'll change for 3d Edition. This entry will be placeholder until we figure out more about how the Nikoul plays.
Kotail Mobile Unit [LI]

The Kotail are by far the Tohaa's most, well, mobile unit, with 6-4 Move and Super Jump. The Kotail is promising to radically change the face of Tohaa game play, and is yet another model without the Tohaa: Fireteam special rule, continuing the trend of allowing players to field Tohaa forces that don't center entirely around Triads.
Kamael Light Infantry [LI]

It's unfortunate to be simply 'good' in the company of excellence. The Kamael Infantry are good, reliable and reasonably costed fighters, but they don't get as much appreciation because of how good Sakiel, Chaksa and Makaul (not LI but still) are. That said, they are capable line troopers with good loadouts. It's very viable to bring lists with a lot of linked Kamael, laying down a lot of Combi fire, supported with the gadgets they can bring along. Do nót underestimate them.
Kumotail [LI]

The Kumotail is quite a package; a Doctor ánd an Engineer rolled into one with an excellent WIP14!? Pretty useful. Its most obvious ability is to recover fighters in Symbiont Armor, but the Kumotail's capabilities are actually far greater. Doctors have a hard time in Infinity, but Engineers can restore E/M'd weaponry, remove glue and immobilization etc. The combination of both rules means that when you're going on missions, odds are good that the Kumotail will nail you some extra objectives. Something to remember though is that if the Kumotail is using Chaksa Servants; activating those will pop the Kumotail out of any Triad it's part of
Chaksa Servant [LI]
As the name implies, it's here to help. For a rock-bottom cost of 3 points you get to expand the reach of your Kumotail. They're also surprisingly survivable, rocking Mimetism and Hyper-Dynamics L1. In any list where the Kumotail can afford to hide, getting 2 Servants to do the work is probably going to be worth it.
Chaksa Auxiliar [LI]

There's been quite the upsurge in the Auxiliar's popularity; as a cheap Baggage (not to be underestimated) Order, Heavy Flamer or Sensor support, or as a Total Reaction HMG badass (the GHRL not as much) its starting to gain traction within the Tohaa meta. What the Chaksa does well is fill several roles (fitting, being Auxilia) that support the other troops. The Chaksa is great at controlling the battlefield with an HMG; it's hard to hit due to the overwhelming firepower of a Neurocinetics HMG, and has 360' vision. Covering flanks is what the Chaksa do extremely well, allowing your Triads to move up safely. Auxiliars don't cost a lot of Orders, they have good stats and a reasonable price. The big downside to them is that you can't put them in Links, but honestly, that's not what they're for. There's experimentation going on with 1-4 Chaksa, and in any quantity they seem to bring something to the table.
Tohaa Diplomatic Delegate [LI]

This is a strange model for Tohaa, especially because the Diplomat's point cost isn't a multiple of 3. It doesn't do much as a civilian, but as a Specialist it's a surprisingly cheap and useful option, if not for the Specialist skills, then for the Flash Pulse which can disable an enemy many times it's own points cost. If you're not filling gaps with Servants, consider a Delegate.
Hatail Spec-Op [LI]

Spec-Ops are in a class all by themselves, literally. Based on a Kamael, the Hatail can do quite a few things. Three of the most notable uses for the Hatail currently (when you can field one) are its ability to bring a full-fledged Hacking Device, it can be a reliable Specialist, and it can be outfitted with Chain of Command, which is amazing (especially if you're using Neema as Lt). There's a lot you can do with a Hatail, so mix and match away. Fun fact: if the Hatail carries a Hacking Device, it can attempt to possess a Combined Army TAG.
Aelis Keesan [LI]
We'll have to see what Aelis brings to tables as we get used to her, especially the impact of her option to bring K1 ammunition has caused a slight stir because of Tohaa's relative lack of AP and EXP weaponry.
5. Getting Started
In the past months the Tohaa has seen quite the influx of (potential) new Tohaa players. Both new players and veteran players come to this subforum to ask questions about particular models and rules, but especially seek out advice on what models to buy and how to construct their first Tohaa Combat Groups. This heading is dedicated to those players, so there's a convenient place to find the most general of advice and we'll avoid having too many of the same threads coming up, fun as they may be.
What to Buy
Tohaa doesn't have an enormous selection of models at the time of writing, this makes choosing models easier than for many other factions. Most players seem to buy the Tohaa Starter Set; it's a good selection of models that gives a proper introduction to the faction, and most players will continue using at least half of the models in the Starter set. It is nót necessary to buy more than the Starter Set when first getting into the Tohaa (unless shipping costs are especially high). Tohaa take some getting used to, and starting small is far more conducive to getting a handle on how they play. But eventually most players start branching out and start wondering what they'll buy next. Almost all Tohaa players seem to buy a Makaul box set sooner or later, and most get them much sooner than later. The Makaul box is good value and provides models that end up in many Tohaa lists. After that things become far less clear, and choices vary from person to person. There is no universally agreed-upon 'wrong choice' for Tohaa, the general consensus tends towards emphasising models that fulfill roles you haven't filled yet and filling up your Combat Groups to 10 models. This is why the Gao-Rael is a popular third choice: it offers a tool against Camouflaged models that the Starter Set and Makaul box doesn't have. The only choices most people tend to make relatively late are Neema Satar and the Gorgos; these are models that aren't immediately intuitive in their use and do better once players know their way around the faction. Finally, new players should consider buying the Hatail Spec-Ops relatively early. Even outside of ITS the Hatail is affordable and an excellent proxy model that can fill gaps in your list while you try out new things.
That First (Tohaa) List
If the first list you make can form two Tridents/Triads and has (close to) 10 models in it you've made a usable list. For Tohaa it's that simple. No matter if you emphasize Kamael, Sakiel, Makaul or whatever else; each list has their own strengths and weaknesses, they're pretty equivalent. Build 80% of your list to preference, then consider your opponent and ask yourself "do I need Defensive Hacking, an Engineer, MSV2, Zero-V Smoke (etc)?" Then tweak the list so you're ready for expected threats. You're going to lose battles no matter what list you bring, just try things out, start small and figure it out from there.
Have fun.
6. Useful Links
This heading hosts a small index of some links to interesting threads or texts that are especially relevant for Tohaa players, and don't fit into the format of this thread. Feel free to post suggestions.
1. Tohaa Numerology
2. Number to Name Generator
3. In-depth discussion of the Gorgos
4. Infinity Basic Tutorial
5. Adv. Spheretactics 101
6. [url=http://infinitythegame.com/forum/index.php?/topic/12350-list-building-in-infinity-or-why-you-see-banners-proclaiming-it’s-not-your-list/List Building in Infinity[/url]Notable Opponents
1. [url=http://infinitythegame.com/forum/index.php?/topic/20340-caskuda-thoughts/]Caskuda[/url]
2. Speculo Killer
3. Avatar
[font=tahoma, geneva, sans-serif]4. Impersonators
7. Tohaa Battle Reports
1. Micky Ward - Tohaa vs Aleph 300Pts
2. Micky Ward - Tohaa vs Yu Jing 300Pts
3. Miniwargaming - Tohaa vs PanOceania 300Pts

