See, I'm OK with counters / markers for status things. But when there are physical objects being placed on table, not so much.
So, why not make them miniature, 3-D objects?
Scratchbuilding Deployables
with electronic parts
I. Mines
II. E/Maulers
III. Deployable Repeaters
I. Mines

#1
DSCI1092.JPG
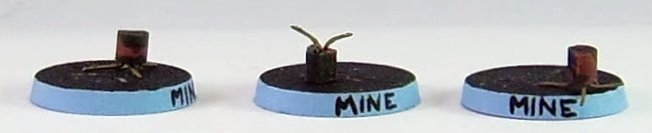
The first and easiest are mines. I took some spare round bases (since I use scenic MAS bases for my minis, I have loads of spare regular bases), glue some cheap transistors onto them (got them from a electric store). Given the nature of Infinity mines, I assumed they are capable of turning around and generating a Claymore-like effect. Well, the transistor seems to just fit the bill... just bend the legs and put them thorugh holes drilled in the base:

Note, should anyone try to go a shorter way and simply superglue the transistors on top of the bases - that was the original solution I used, and it proved t be a bad one. Contact area was too small, and the "mines" broke off the bases leaving me with that:
#2
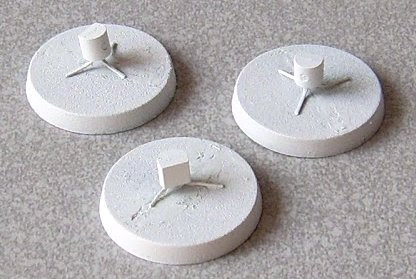
That's how they look with spray-on white undercoat.
#3
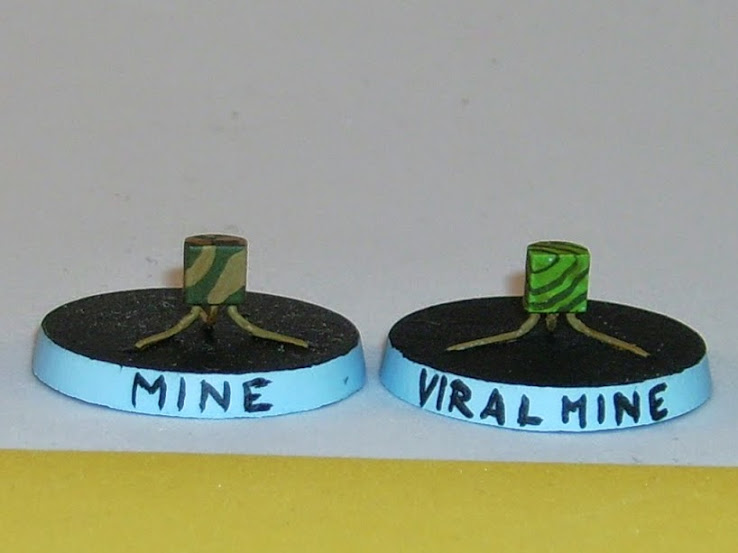
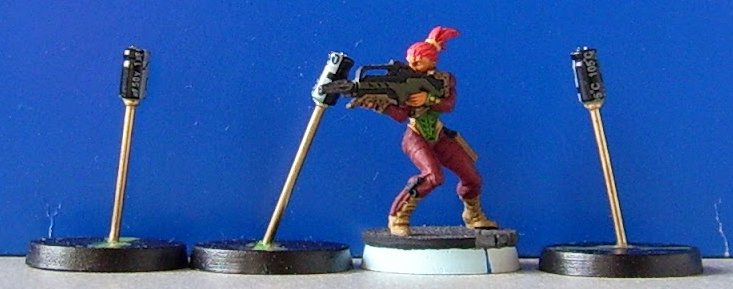
And painted, ready to be deployed.
As you can see, simply altering paint scheme and label can turn them into different mine type (I don't have Mono mines available for any of my armies, therefore I didn't made them).
II. E/Maulers
These are a tiny bit more complicated.
#1

I took 3mm LEDs (cheapest, no matter the specs) from an electronics store (actually the same I bought my mines, I mean - transistors at
Also, nails (1,4 x 40mm, brass-coated) - I considered using tailoring pins, as they are 0,7mm thick, but they bend way too easily.
And naturally, spare regular bases.
Plus Superglue and green stuff.
#2
https://lh4.googleusercontent.com/-Q5Rxus18fmg/UCVWlcP2c5I/AAAAAAAAB5g/MozxKT5Mfl8/w704-h553-no/DSCI1151.JPG
Compared the nails aginst a miniature and cut them down.
Cut the legs off the LEDs (I figured they'd be too delicate to use). Unfortunately couldn't have cut them flat at the base.
Attached to the nail heads with greenstuff and glue.
Filled slots in the bases with greenstuff too (not shown).
Allowed it to cure.
Yes, these are laundry clips, I use them as general hold-em-all.
#3
Drilled holes in the green stuff and glued the nails in.

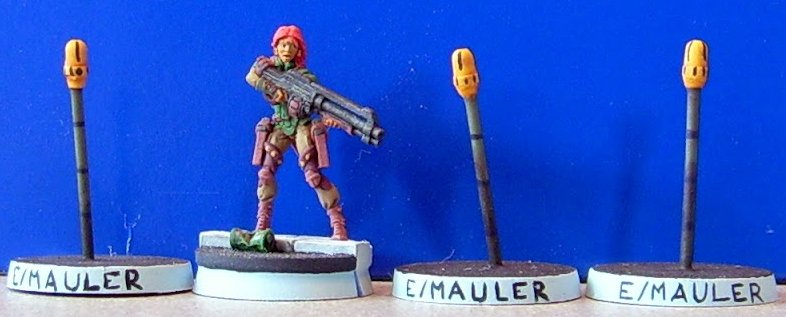
That's how high these are.
#4

Primed and ready to be painted!
III. Deployable Repaters
Exactly the same technique as E/Maulers, and a bit easier to do.
#1
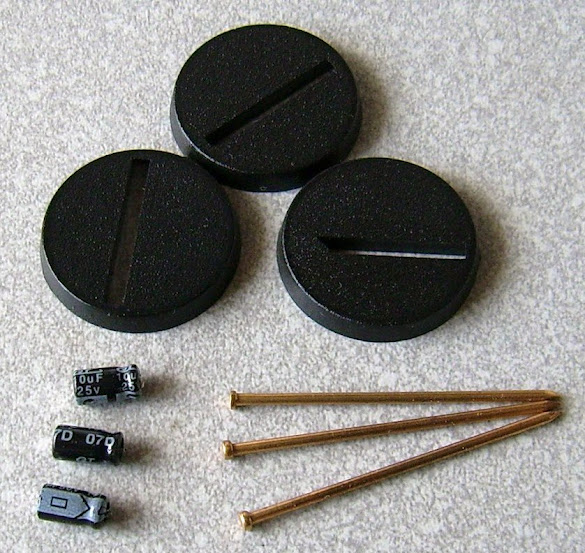
As you can see, they are based on exactly the same idea as the E/Maulers were.
The only difference is that I used small condensers instead of LEDs (they lack legs, because I scavenged them from a dead computer mouse, and had to clip the legs in the process).
#2
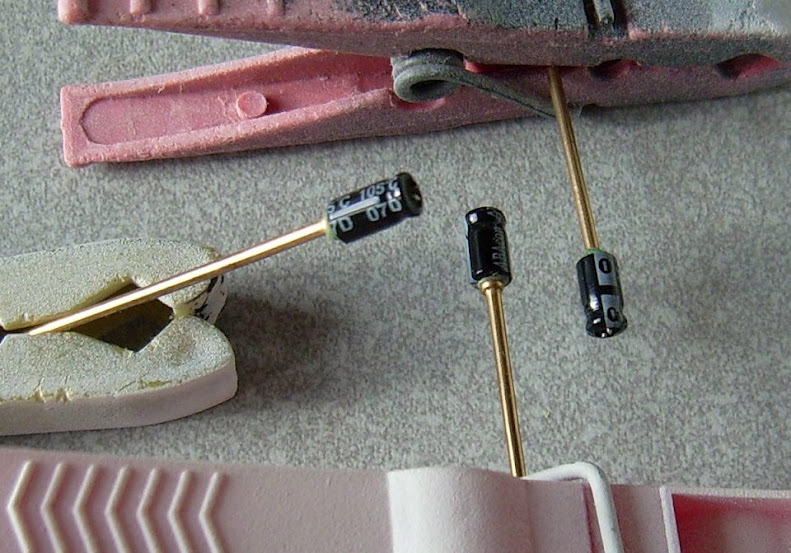
Glue the condensers on the nails. I hadn't cut the nails down yet at this stage, because I needed to compare them against a miniature's height as complete devices.
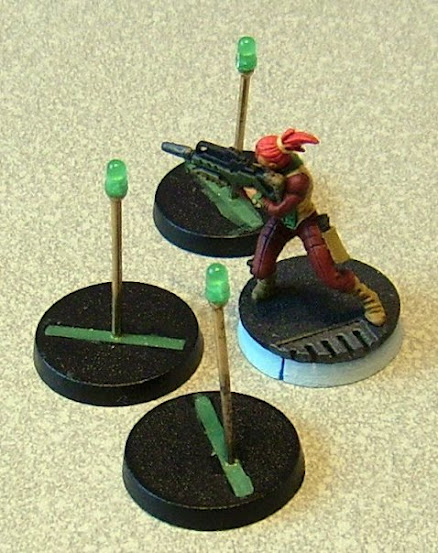
#3
Take some bases with slots filled with greenstuff, drill the holes and glue the Repeaters in.
You could cut the masts down to size before gluing them into the base (as I did), or after it - make them stick over the base as much as you need, and then remove any excess from under the base. However, this could result in some leftover requiring filing it down.
...on afterthought, better cut them down first!
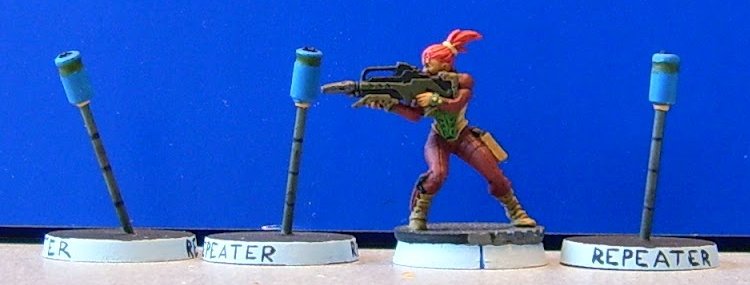
#4
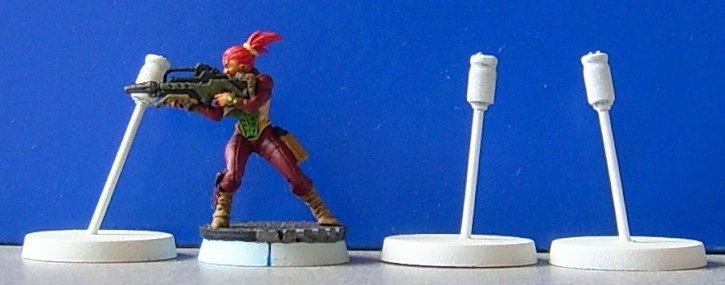
Bang, ready for painting!


