With the soon to be released starter box of the Combined army models I thought it would be a good idea to do a tutorial on a possible way to do their bases. Now I tend to really over analyze things when it comes to minis. For example I have only ever painted one model for my friends combined army in 6 years because I could not come up with what I thought was a adequate base for them. Well inspiration can strike at any time and often something mundane can cause.
Case in point these

My wife picked these up at the advice of her dentist. Well I saw them and boom!!! Inspiration immediately struck.
I have always liked the idea of how Angel did the CA bases. The light blue color seeming to work its way over the ground. To me I always took this as the CA's infestation spreading over a planet and infecting every inch if it. I wanted to run with that but wanted something different. I wanted something that seemed more aggressive to really mesh with the whole fluff of the CA. So I chose to use these toothpicks as alien fauna that spread over a planet as the CA does. In this part you will see how I got started and in the next installment you will see how I took my ideas and mixed them with Angels color ideas.
Lets begin shall we.
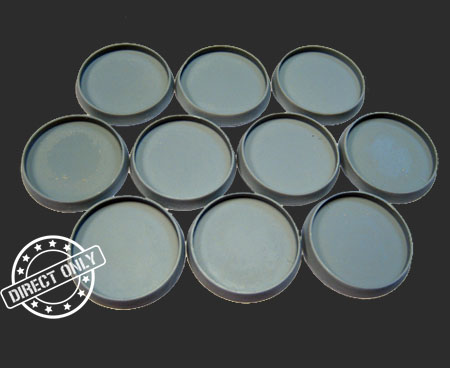
I wanted all the bases to have water features and I wanted a good mix of height and depth without making the base itself stand to high. Because of this I chose to cut the top off of the base and work from the bottom up. You have seen this in previous tutorials I have done so this is no different.
1- I carefully remove the top of the base with an exacto knife. I use the outer rim as my guide and remove the center of the base.


2- I use an emory board (any file will do though) and smooth out the inner edge of the base.

3- I then take the base and glue it to a piece of thin plasticard. Be sure to put glue along the entire bottom of the bases rim in order to have a complete seal.

4- Then with an exacto knife I cut away the plasticard and use the emory board to smooth out the edges.

5- I chose to use four mediums for the bases. Cork, wood chips and slate and sand. Here is the first layer of just the cork. I cut it to fit in place and then use the tip of the exacto knife to chip away pieces and get a natural stone look.

Next is the addition of some cork pieces left over from chipping away. I put them at the bottom where the water will be. I cover the entire bottom (white part) with crazy glue and with a pair of tweezers place the chips in whatever location I want.

Once that is done but while the glue is still wet I sprinkle sand over everything. As I am using crazy glue it bonds immedietly so I can turn it over and shake out any excess.

6- Next I build height by using a piece of wood chip and some slate. I look through my chips and slate until I find either the appropriate pieces or pieces I can alter to fit the spot I want to put them.

7- I then will add the wire that will be the stalk of the alien plant. To bend the wire in natural ways I tend to use paint brushes, exacto knife handles, etc. Anything that is round. I will bend the wire around them or use them to manipulate the wire and get natural looking curves. I will in some cases also use the white shaft of the toothpick itself. These are trickier to use as they want to snap so what I do is cut the shaft where it meets the handle your supposed to grab on the toothpick. I then hold the toothpick by the blue end (this protects those little bumps from the heat) and I roll it back and forth over a lit light bulb. The heat from the bulb is enough to soften the plastic to prevent it snapping. You may have to do this several time until you get the bend you are after.

8- Once this has been applied and is sturdy I cut off the blue end of the dental toothpick and glue it to the end of the wire. I will also bend this to match whatever I have done with the wire.


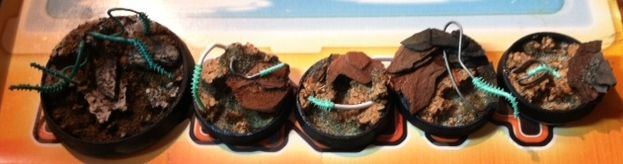
Here is a shot of an assembly line of bases
Here is a WIP shot of the largest of the bases being painted. I will cover painting and all finishing touches including water effects, ground cover, etc in the next installment. I hope this helps or inspires and please feel free to ask any questions you may have.

Thank you,
Athanadros