
Cardbuilding #4 – more houses!

In Cardbuilding #3 I was making the basic, 10x20cm building. I had a few ideas on how to make it more interesting, but the text was growing too big already. I had to end it somewhere.
Still, it would be a waste not to use these ideas 🙂 I’ll be rather brief here – most of the projects keep the same measurements as in Cardbuilding #3, and if you’ve read the previous texts in the series you should be already well-versed with the technique.
If you haven’t read them yet – I suggest you do it.
The basic roof, version 1.5
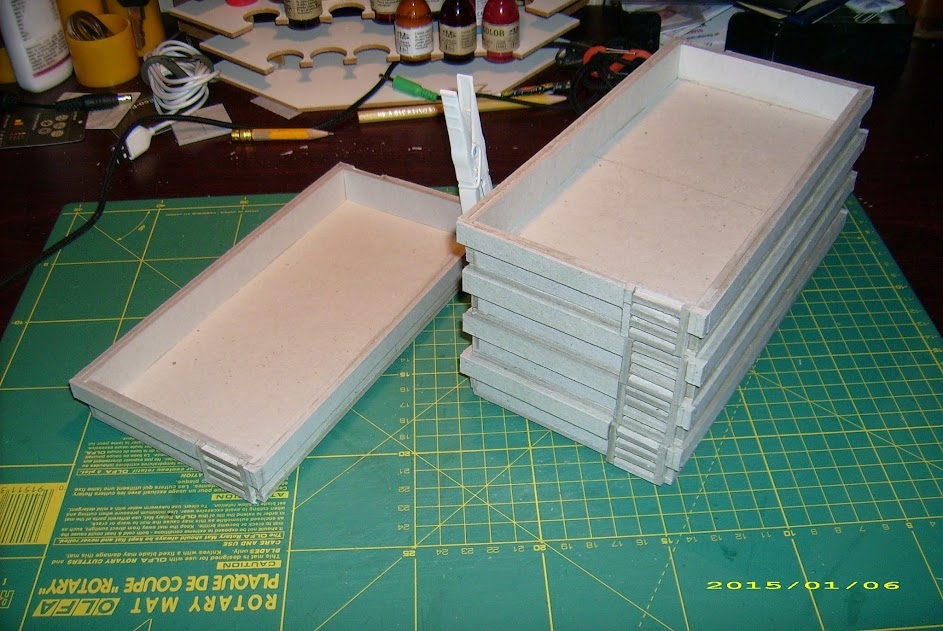
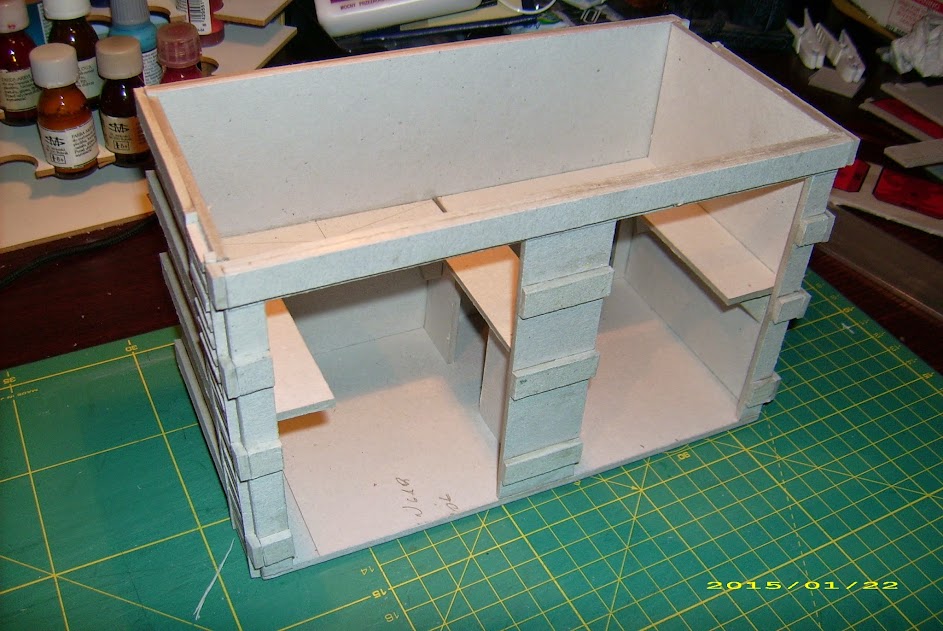
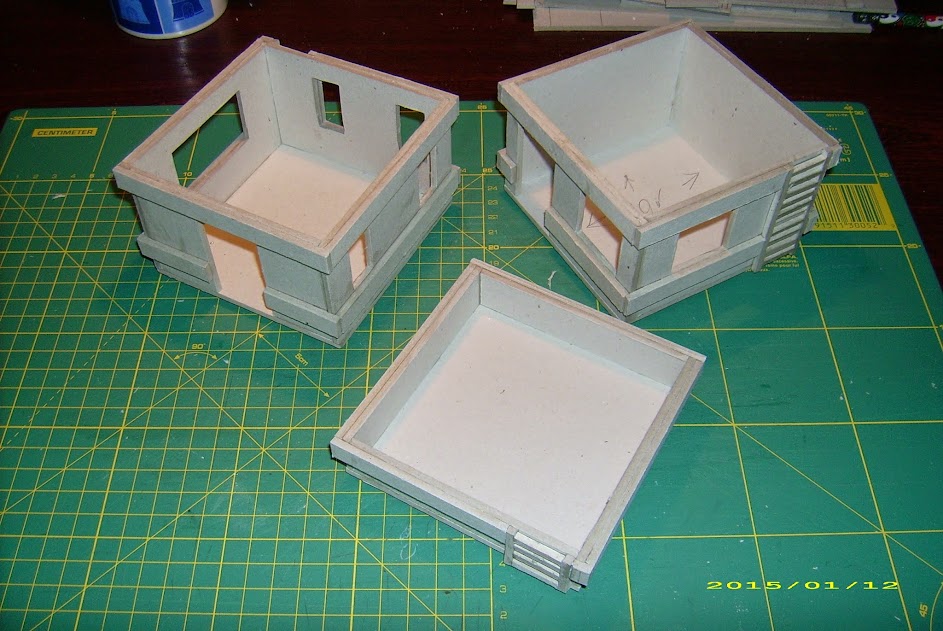
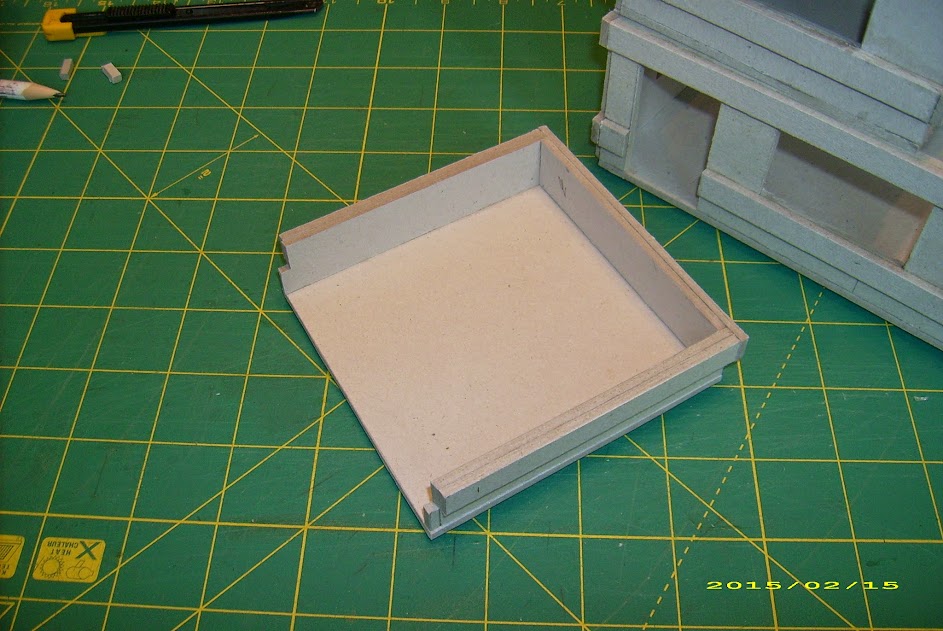
The basic roof shown in Cardbuilding #3 has one irritating flaw: due to the corner supports, it is not stackable (there is no space for the underside pegs to go into). One solution would be to use shorter corner supports (say, 10-16mm tall, instead of the full-length 20mm ones), though I decided to use 10mm external decorative beams, just like on the buildings themselves.
Now, these can be stacked for storage or extra roof height on table. Also, 3 of these roofs are about as high as a single floor (well, 6mm taller, to be precise).
I could’ve added various structures on the roof, but this would inhibit the stackability. So – another time (and another way!).
Modified floors
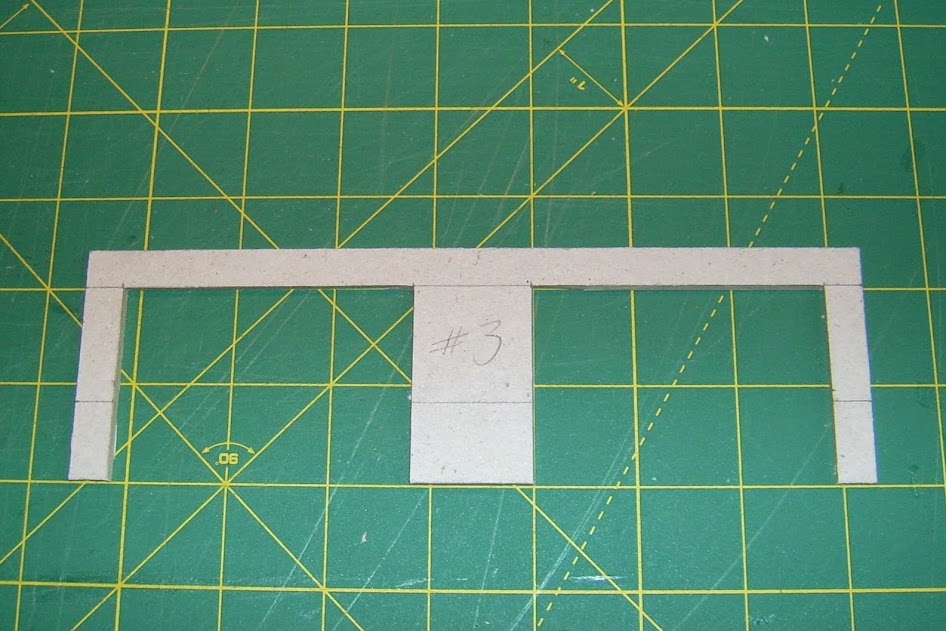
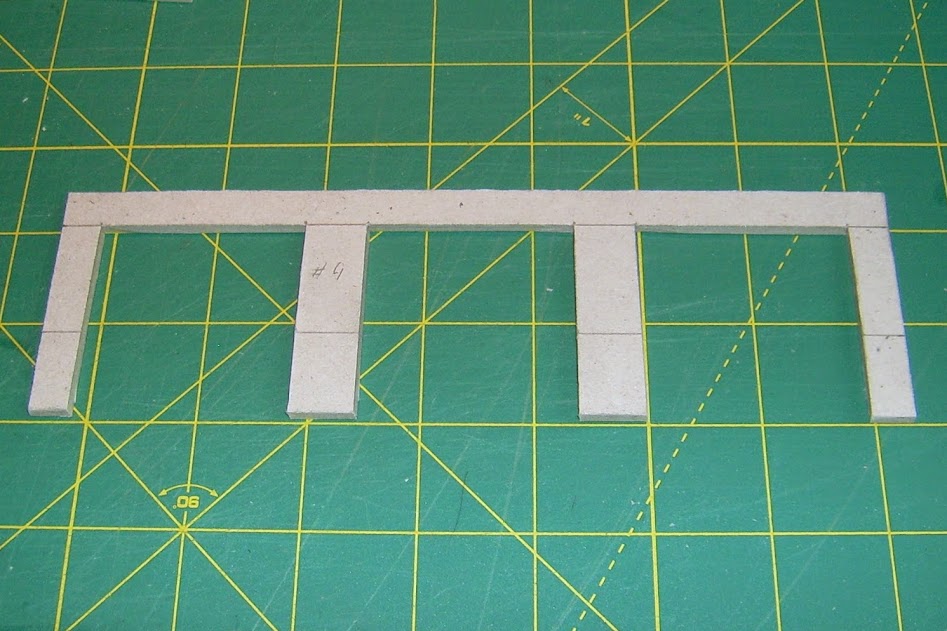
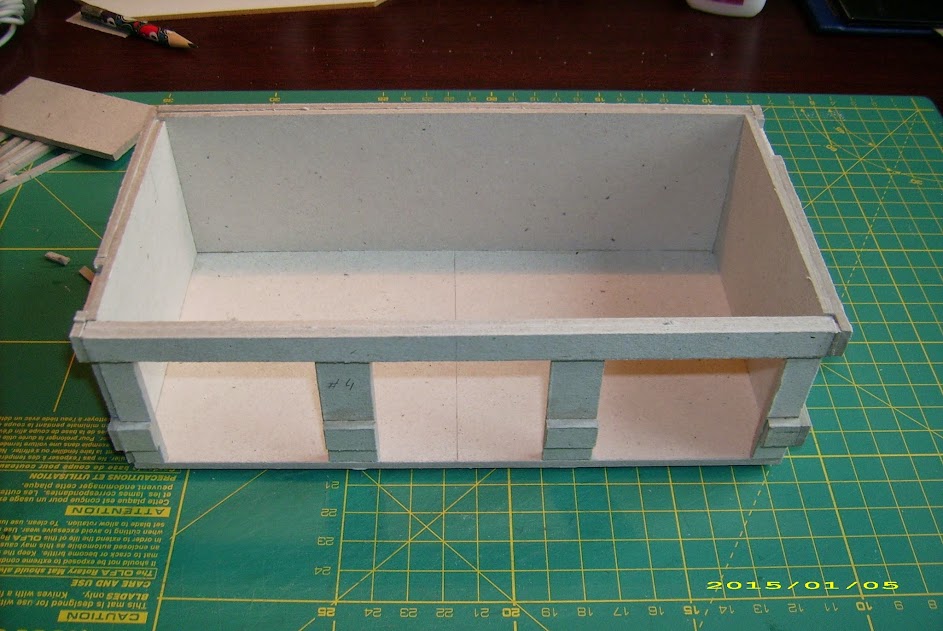
The basic floor is all fine and dandy, but it would be a little boring if we had all of them looking exactly the same.
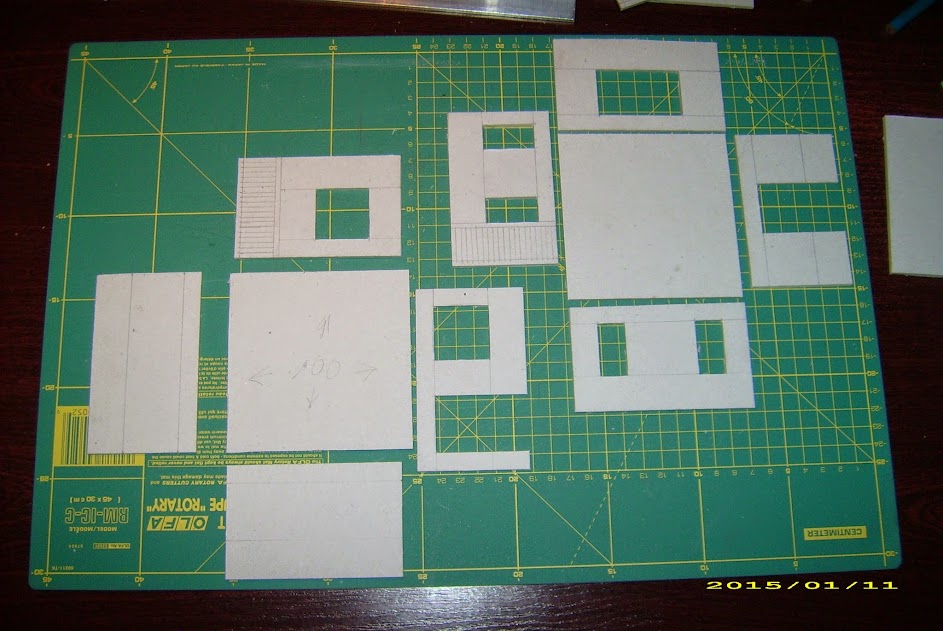
Variant 1 – smaller windows.
The 50mm wide windows on the basic floor are rather big. Let’s make some smaller ones. I’ll keep a small window 30mm wide (still a lot in RL equivalents) so it will be fine with the rules as an entrance for 25mm-based models. Naturally, 15mm windows would still do fine for LoS purposes, though they wouldn’t be making obvious entry points – it would have to be houseruled whether a Silhouette 2 model can make it thorough.
Keep in mind that putting two 30mm windows on the short wall makes for a pretty dense arrangement (because off the 94mm, 25mm is going to be taken by the ladder, leaving us with 69mm space – take two 30mm windows from that, and all you are left with is 9mm to divide the window frames from each other and the wall). One 30mm and one 15mm should, however, work together just fine (there will be 24mm left).
Of course small and large windows can mix and match however you like.
I’m using simple, rectangular windows for one basic reason: they’re quick and easy to cut. Any more advanced shape would probably look better, but also require more time and effort.
The front wall here has a 30mm wide door and two 30mm wide windows.
The rear wall has a 15mm, 50mm and 30mm wide windows.
Variant 2 – more doors.
That’s pretty self-explanatory, isn’t it?
Keep in mind that it would work better as the ground floor. Otherwise you will either have to provide extra staircases, or accept these as full-height windows.

Of course, it is always possible to use it with a half-roof as a partial 2nd floor on an L-shaped building.
Variant 3 – the garage
Obviously inspired by the MAS District 5 Garage, I decided to give it only one small door on one end, and two large garage doors – actually wider than the 50mm Wide Door marker as to make beliveable vehicle access: 75mm wide.
Which results in a following breakdown of the 200mm front wall:
10mm wall,
75mm garage door
30mm wall
75mm garage door
10mm wall.
Definitely better as a ground floor, though the huge garage doors could make if for some enormous windows. In that case, better make the door in the rear wall, not the side wall.
I wanted to keep the interior open and free of walls to retain storage capability. This forced me to keep the garage doors 50mm tall – same as normal doors (still, I’ve seen many garages with gates just as tall), otherwise I’d have to add an internal wall (separating out two vehicle bays) to support the 30mm wall in the middle of the front.
A garage is not likely to have a window in the opposite wall, but I gave the side walls a 15mm window each as to allow some daylight in.

Variant 4 – the garage #2
This one is similar to the above, but holds 3 more narrow vehicle bays with 50mm gates. The walls are 10mm on the sides and 15mm between the gates. In the scale we use, it still makes for a believable (if a little narrow) garage door for your average car.
This time, absolutely no windows.
Variant 5 – small warehouse
A 50mm gate in a short wall, a door in the long wall (perhaps accompanied with a small window, so you could use a removable internal wall to separate out some office space in the rear).
I initially intended to implement a 75mm gate, but that would interfere with the ladder.
I guess we’re pretty bored with the basic buildings at this point, aren’t we?

Now, those were the variants that don’t change the overall dimensions. We can still go a bit wild (or creative) here and make:
TAG or vehicle garage / service bay
Due to TAG model height this one should be double height from the start (123mm wall height, this includes what would be upper floor’s floorplate), with 75mm-wide gates, and catwalks on the upper floor level (note – the 75mm was there before N3 introduced 70mm as “cargo access”)
I’d construct it on a Garage #1 general layout, just twice as tall.
A Small Warehouse layout would do better for a vehicle service bay.
Either of these could have a gantry crane if you feel you could (and really have to) make one 😛 For practical reasons, I’d skip that – it would have no in-game effect, and it would very rarely be visible at all… but a pain in the butt to make.
Now, as for the catwalk – it should be cut as a single piece. I was running out of cardboard, therefore I made it out of separate parts.
The ladders are separate pieces standing on their own.
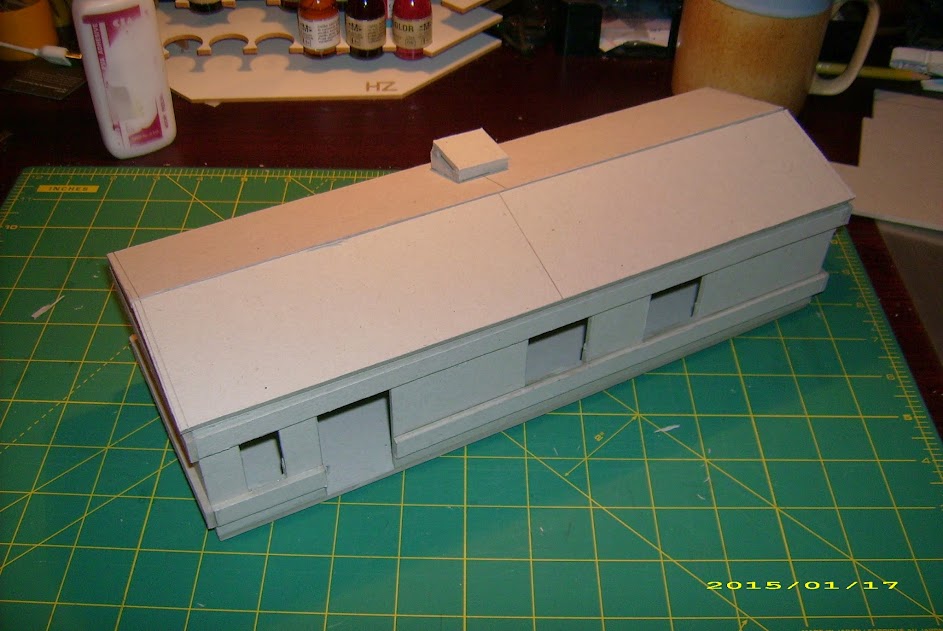
Barracks
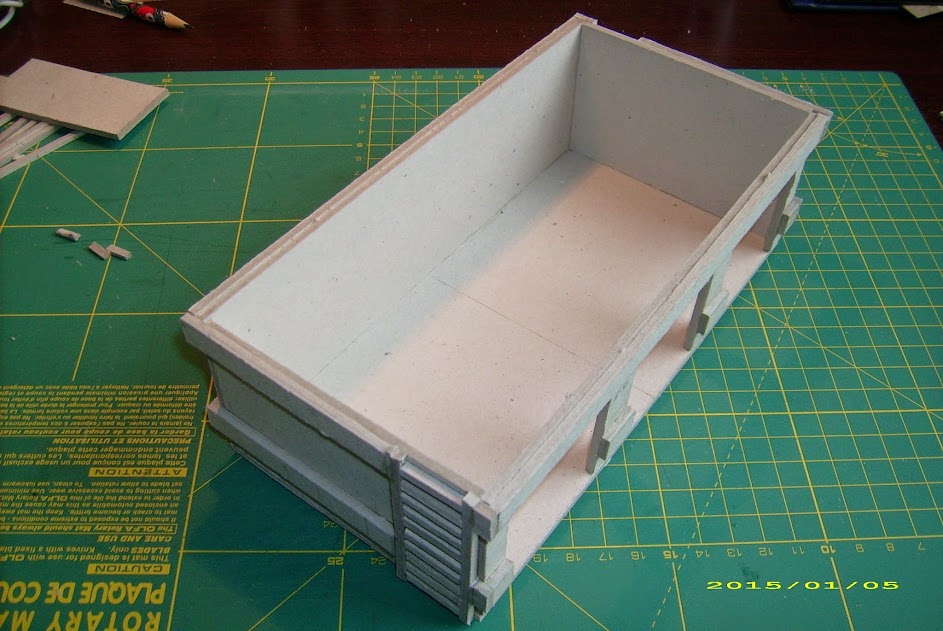
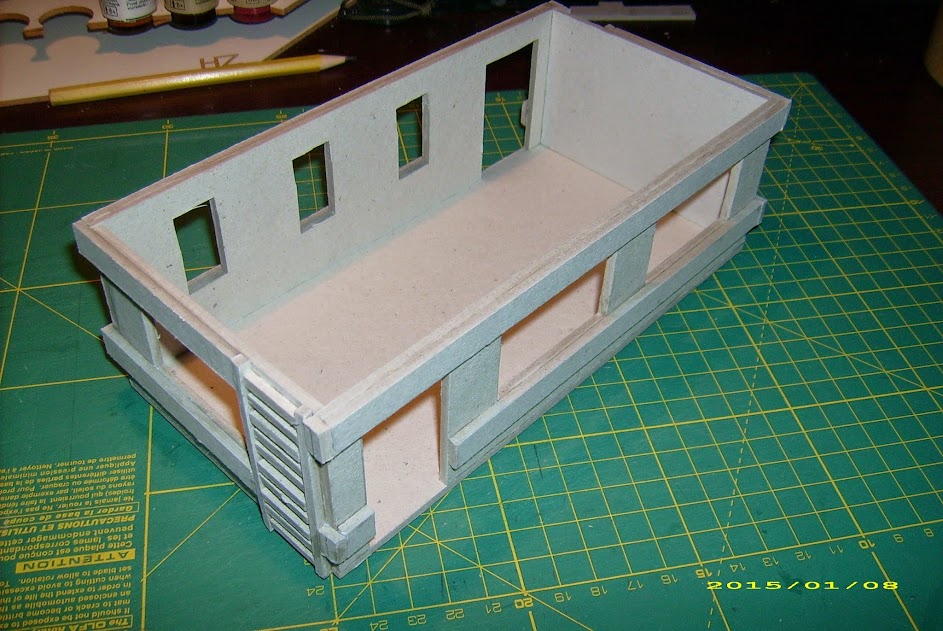
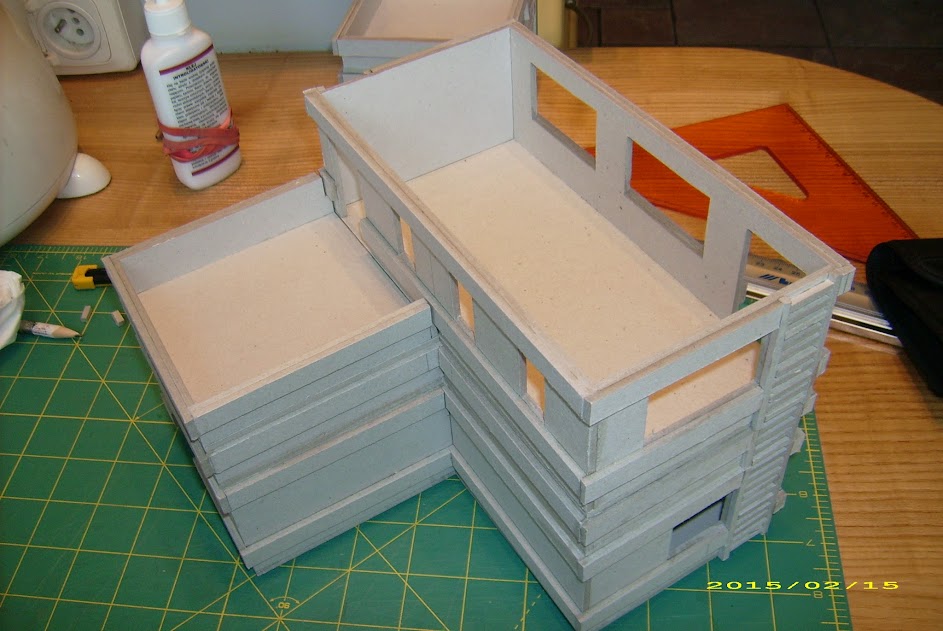
Our standard 100x200mm buildings do fine, but they do not provide too much room inside. Why not stretch them to 300x100mm? All the internal walls will fit just the same to separate out stuff like toilettes or storage rooms. Excellent for military base (or prison camp) living quarters 🙂 This type of building is pretty likely to have doors in the short wall.
You could, of course, stretch them even more and in any direction. Longer, wider, higher. I’m not going to do that here – much longer buildings wouldn’t be practical on the gaming table as a general terrain, and it would force me to alter my plans regarding the centerpiece / storage building (which is planned to be dealt with in Cardbuilding #5).
Since I intend to use these with double-pitched roofs, I’ve left out the ladders from this project. Which actually sped up the building process. Also, 300x100mm footprint is the minimal size I’d consider to be practical to use internal stairs. Not going to do them here, though.


Perhaps it is the matter of space limitations, but I guess that if I were to make a 400mm long building, I’d consider making it in two parts, 200mm long each.
L-shaped building.
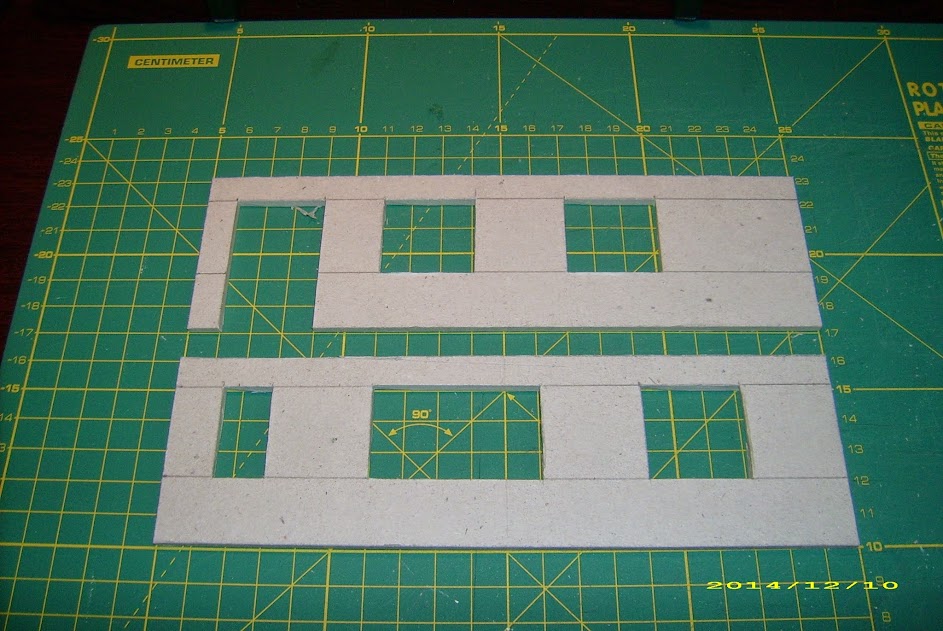
More interesting in shape, but less universal, the L-shape is still doable.
Let’s cut a 200x200mm square, then remove a smaller, 100x100mm square from one corner. Voila, we have our L-shape floor, and a ready plate for a smaller building. Unless you don’t want to make the smaller ones, then start with 300x200mm and separate it into 2 L-shapes.
We’ll need walls. This is going to be a bit complicated due to the shape here, we have to take the wall’s thickness into account:
1x 200mm
1x 197mm
2x 94mm
1x 100mm
1x 103mm
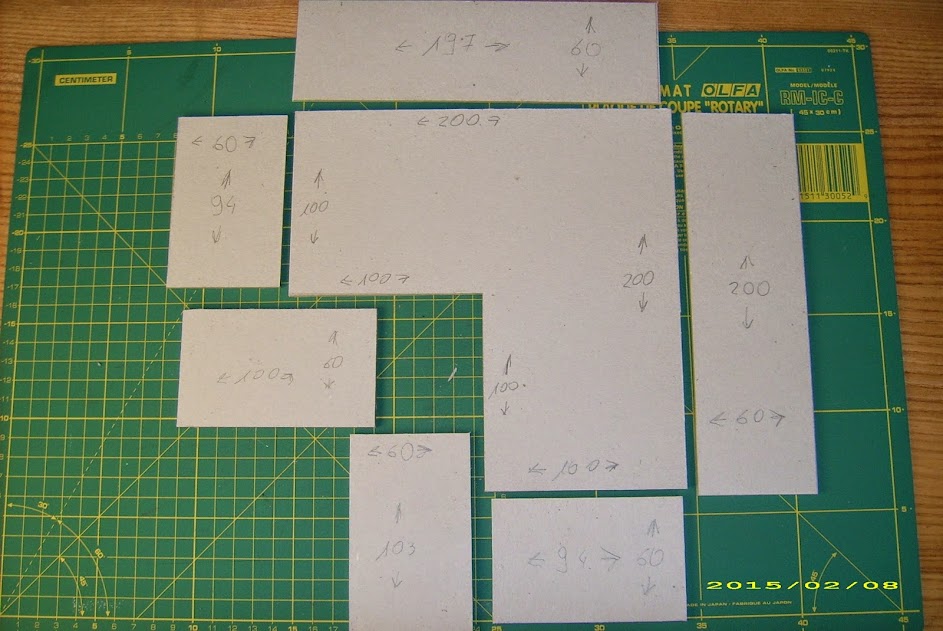
Same lengths for the roof railings.
Keep in mind that decorative / support strips will be adding to the size of the building for storage purposes. We’ll have to keep that in mind when designing the next level of our Russian Doll terrain.
Door placement – since this style of building has distinctive long walls and loads of short walls, placing the doors can be tricky. Remember that unless you want to make separate stairs just for this building (which could be an idea, as not to have all the stairs on our map looking identical) you should avoid placing doors on the left-hand side of the inner L.
I must say I didn’t like building the L-shapes, so I guess I won’t be making more of them. These two will have to do.

Note on storage / stacking: with the decorative / support beams, two of these buildings can be fit into 212x312mm space. Definitely not going to lie well with standard buildings underneath, I have yet to check how it would go with them on top (or long barracks on top).
A 212×212 space occupied by a single L-shape and single small building (can be layered up with the same) is definitely an option.
Small building
Again, inspired with MAS one (the “guardhouse”. Doesn’t have to be a guardhouse, though).
The floorplate is 100x100mm, which makes the walls into 2x 100mm, 2x 94mm.
Now, there’s one tricky thing with this one.
See, with the basic building we had only two ways to place the upper floor if we wanted one. Doors in line, or the upper front having doors on the opposite wall.
With the L-shape, there was no problem at all – the floor cannot be turned in respect to the ground level.
But the small building, hah. You could turn it every 90 degrees if you wish. This in turn is going to wreak merry hell with the roof ladder placement. If you make one ladder, it will mean there will be only one way to place the upper floor. With two ladders (on opposite walls) – two ways. Only four ladders will allow us to deal with this problem fully, then again – it wouldn’t be too realistic to have 4 ladders to the rooftop on such a small building.
So – either stick to a single (or – even though it’s stretching it – double) ladder (and as many options of positioning the top floor), or invent some clever, removable ladder. I can’t say I don’t have an idea for a removable ladder in mind, but being made from a 3mm cardboard, it would be pretty fragile. I’ll stick to the single external ladder design.
Note on storage/stacking: these small buildings are, due to the decorative / support beams, 106x106mm, which means you can put one on top of a standard building (for either storage or game purpose), but not two.
However, two of these fit under a single standard-sized building just fine (that is, if you accept the fact they will be 6mm wider than the standard one).
Other building shapes
There’s nothing to stop you from making a 200x200mm square building – for example, to serve as an objective room (in fact, that’s what I started with in Cardbuilding #1). However, I’m not going to do it here: my gaming group has enough of these, plus it would question the point of building a container / building for the same function I have planned for Cardbuilding #5.
That, or any other shape that crossed your mind!
Variant stairs
This style of stairs I made just to break out the monotony of the design shown in Cardbuilding #3. Instead of sticking neatly along the side of a building, this one goes straight to the door.
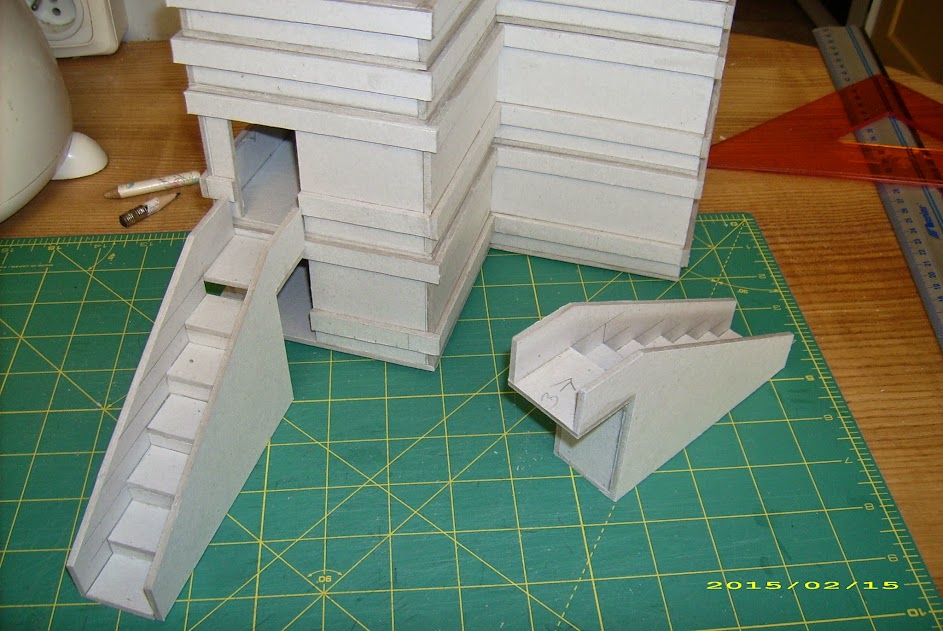
The basics are similar – 30mm wide, 20mm deep steps. The platform on the top actually isn’t necessary, but I think the stairs look better with one. It also allows us to leave a passageway underneath, so in case you set up the lower floor with an entrance there, it won’t get blocked.
I guess wider stairs would look better (I guess 50mm wide would be just right). I have to build a ramp too, one day…
Variant roofs
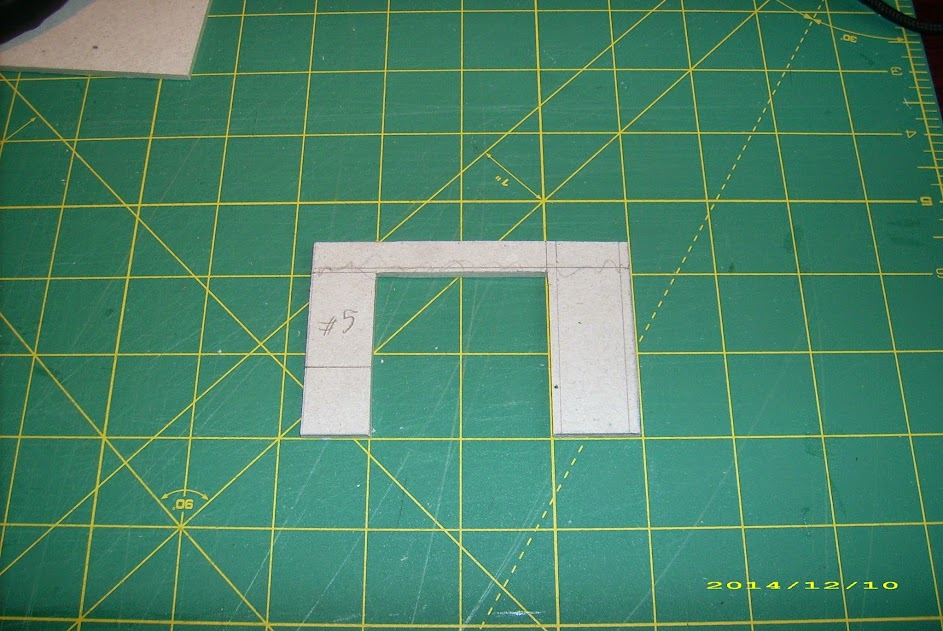
Half-roof. This one allows you to add a small building as a top floor for a standard one, or standard one as a top floor for an L-shape.
It requires a 100x100mm floorplate, and 3 (not 4!) sides – one 94mm, two 97mm. I decided to forgo the ladder – if there’s one on the floor’s side, it will do, if not – there won’t be one on a roof’s side to confuse the players.
Important note – remember to make a cut / notch on the upper half of each side, 3mm deep, and have the decorative / support beam accordingly shorter, as to allow to fit with the building’s beams.
Some examples of application:

Different roof styles.
What I have shown in the #3 Cardbuilding, is a flat, terrace-like roof. It has balustrades around it, and a lot of easily usable surface.
It is also pretty bland. There are several angled designs being widely used in the world, and they look far more interesting.
The exact reason why I’ve chosen the terrace roof as standard for my buildings is threefold:
- It is easiest to build for our purposes.
- Takes least space in storage.
- Is most useful game-wise (I mean – in terms of placing and moving models on it)
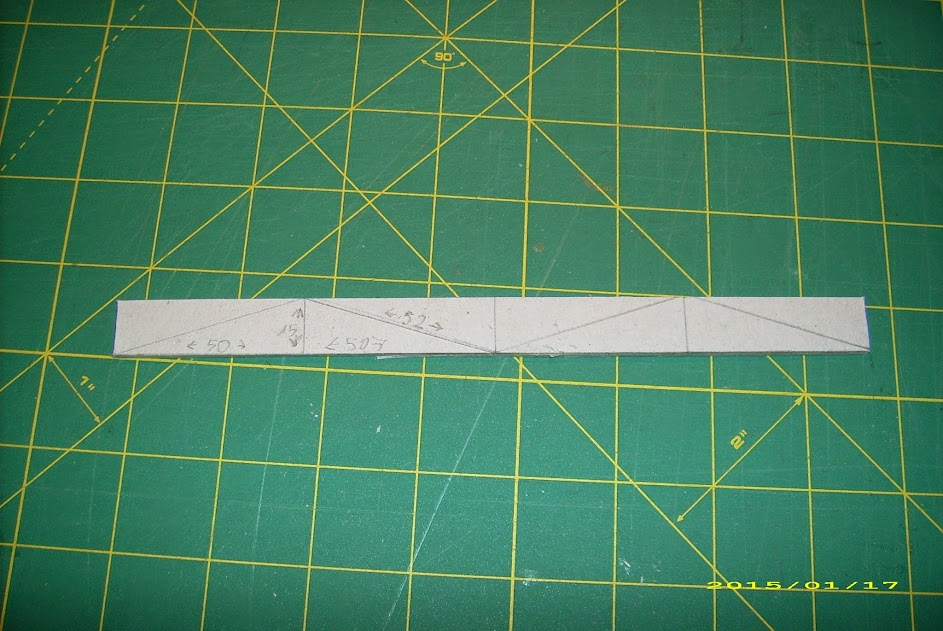
For a pitched roof – let’s start with a two-pitched, generally most common pitched type where I live – we’ll need triangular roof sides (“gables” in proper English. Usually, these would be on the short sides). The exact ratio is up to you, as pitched roofs are made with anything from 1-in-12 to 18-in-12 pitch ratio (and more, if somebody really wants).
FYI, “roof pitch” means how many units of height does the roof gain per how many units of width. A 10 centimeter wide, 1 cm high roof would be 1-in-10, and so on, if single pitched, 1-in-5 if double pitched. Keep in mind that pitched roofs tend to overhang the wall of a building by some margin (from a few centimeters (to keep rainwater from soaking the wall) to a meter or more (providing top cover for storage space or walkway).
This determines us the size of the roof cover; the 2 plates we’ll use to cover the roof. In case of a 18-in-12 pitch, the end plate is basically an equilateral triangle, so the roof plates need to be close to the size of the baseplate (well, I’d make them a little wider to come down on the sides, but you get the picture).
Now, if you want the inside of the roof to be accessible, at least one of these two plates has to be removable and equipped with supports to keep it from falling off. It would be also advisable to make access point (door) in a place that could be believably reached by a model on the ladder. Unless, of course, you intend to use this roof / attic as a self-contained level 2 for your buildings, accessible by the stairs.
It would be advisable to cut some windows in the roof, too, so placing troops there would actually make any sense.
From there, we get really close to a true mansard roof (aka French roof), which basically has two different angles on every slope, and windows put in the more steep, lower slope, and makes for a playable floor on its own.
Damn, I have to give it a try one day! But that will be once I get out the problem with stairs sorted out.
Now – sorry, guys – I’m not going to make every possible style of a roof for you. It would take a lot of time, and I have a limited amount of storage space (as I said, one of the main reasons why I’ve chosen terrace roofs). If you want a specific style, let me know and we’ll work something out.
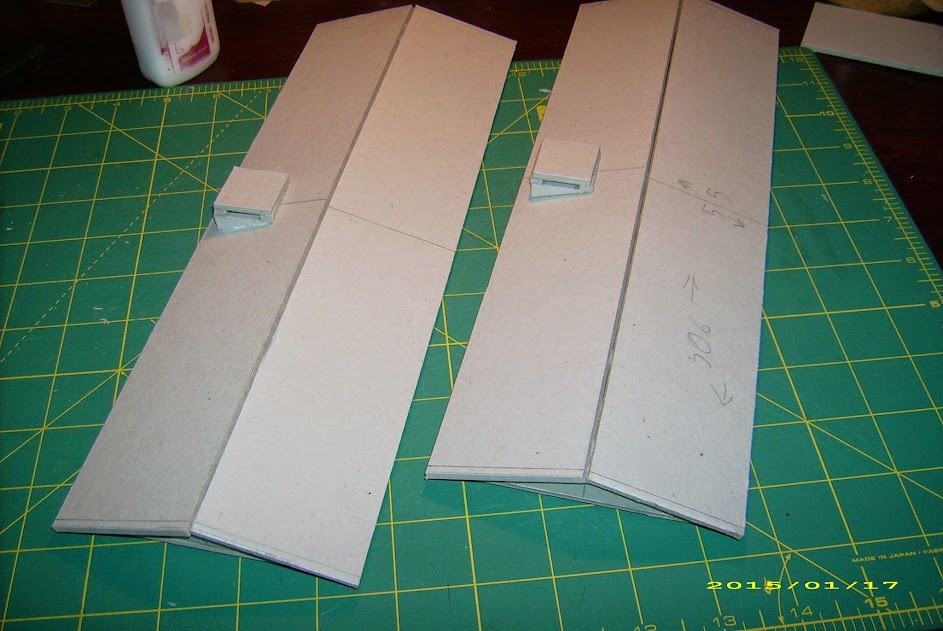
I decided to make a two-pitched roof for the long “barracks”. Since I have to mind the storage, these will come rather flat – 15mm high at the top point of the gable (the end wall of a roof, triangular in this case), that will be 100mm wide at the base. This also excludes the need for the attic (i.e. inside of the roof piece) to be accessible – being 15mm tall, it doesn’t offer practical space for models to act inside.
Given that the roof is going to be 300mm long, I decided to give it extra support triangles (same size as the gables) inside – spaced every 100mm, just to be sure.
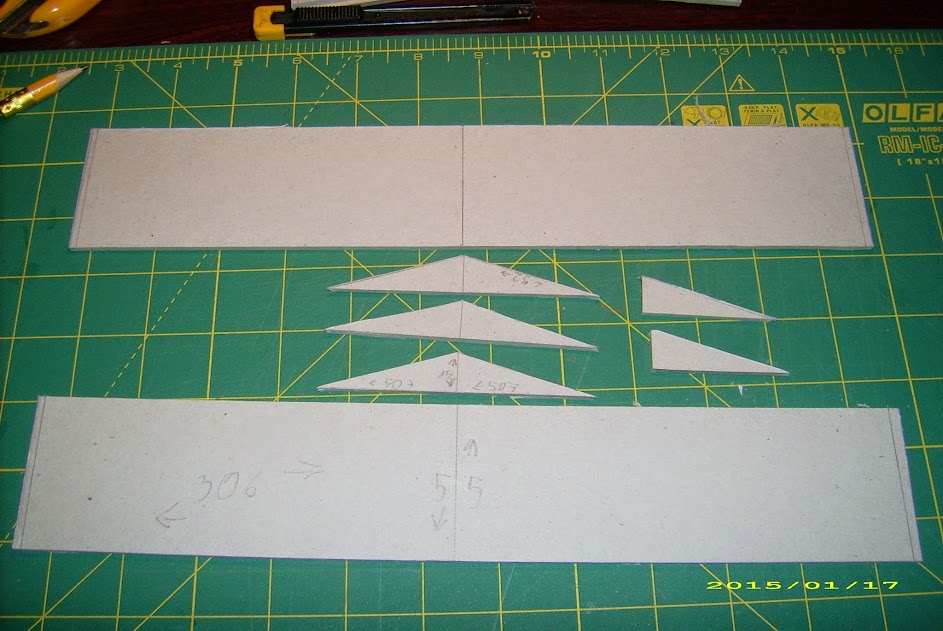
The roof plates are just flat slabs of cardboard, however, they are 6mm longer (306mm in this particular case) to create an overhang effect.
For aesthetic reasons, it would be perfectly OK to have the roof overhang more, but it would then interfere with storage requirements.
Unless you make a tall two pitched roof, with 90-degree angle between the roof plates, there will be a problem with the top edge (the ridge of the roof) – the edges are not going to fit together tightly.
A couple of ideas as how to solve this:
- just fill it with a putty and let it be.
- glue in a ridge flashing outer (y’know, that raised piece that covers the junction on a roof’s ridge), made of paper. Standard printer paper will do, though I’d prefer to have ti filled with putty underneath.
- design the ridge from the start as having a flat passageway on top. I’d make it 25-30mm wide (which, scale wise, is far wider than real-life, but it has a purpose – remaining a legal place for a human-sized model),
- add a flat passageway / catwalk (on supports) along the ridge,
Roofs tend to have small pieces on them, too – especially chimneys (for ventilation purposes, or even actual smoke). If you cut your gables from rectangular pieces, you should have some leftover material with the same angles – now all you need is to add some flat slabs and turn these into chimneys. Remember that if a chimney is large enough (and flat-capped) it will be making a convenient point to place your model.
Well, that would be it for Cardbuilding #4. Next time, I’ll take on large buildings capable of housing the standard ones, Russian Doll-like, to act as storage containers as well as actual tabletop terrain.


I am deeply impressed with what you can do with cardboard. How do you cut it out so accurately? When I try to do that, it ends up in a mess.
I think Infinity has a lot to gain from interior walls. Some of your buildings are rather big, the barracks for example. Interior walls would be great there.
Hmm… draw the lines well, place the ruler next to the line, and hold it well to keep it from sliding (a professional ruler with steel edge and no-slip inserts does indeed help here). Take a sharp knife (I use Olfa snap blade ones) and pass along the ruler. Several times, and at least in the beginning – gently. Don’t try to cut thorough in one pass!
I guess that’s the secret 🙂
As for internal walls – check Cardbuilding #3, I have shown internal walls there, and the same solution will work for these buildings (actually, the barracks were made with an intention of using these walls in them). This part, however, is about different variants of the buildings.
You could install some permanent walls inside, of course. But that would interfere with using the buildings as containers to store other terrain elements (intended to be made as a part of Cardbuilding #6) – the TAG hangar is a good example of that problem.